Record video on Mac can be handy for various purposes, such as creating tutorials, capturing gameplay, or sharing memorable moments with others.
Fortunately, Mac offers built-in tools that make the process of video recording simple and accessible.
This guide introduces you to the methods and steps involved in recording video on Mac, allowing you to unleash your creativity and capture moments in a visual format.
Before going forward, if you need help with universal controls, find easy ways to fix universal control not working on Mac, and then proceed.
Let’s get started!!
Easy Methods to Record Video on Mac
Whether you’re a content creator or educator or want to capture and preserve moments, this guide will provide the knowledge and skills to start record video on Mac.
With that, you can speed up videos on your iPhone too. For that check out the guide on how to speed up videos on iPhone.
Method 1: Using QuickTime Player
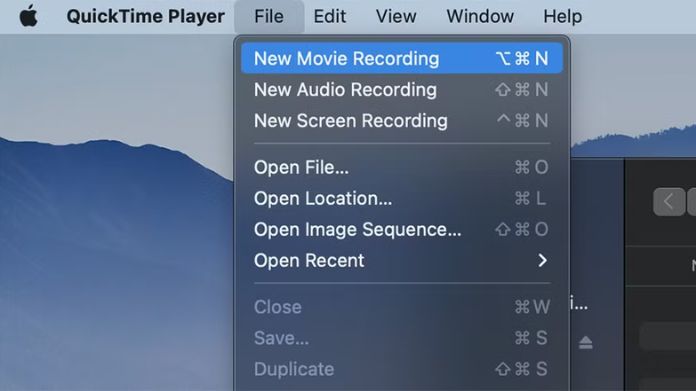
 You can record video on Mac using QuickTime Player. QuickTime is Apple’s native app for video playback. However, it offers many additional options, including video recording using your webcam.
If you are new to Mac and unable to find Mac’s Utilities Folder, check quick rundown effective methods to help you to find Utilities.
To record a video using QuickTime Player on your Mac, follow these simple steps:
Step 1: Open QuickTime Player to begin recording videos using QuickTime Player, you must open the application. You can find QuickTime Player in the Applications folder or use Spotlight search to locate it.
Step 2: QuickTime Player is open, navigate to the menu bar and click “File.” From the drop-down menu, select “New Screen Recording.” This action will launch the screen recording window.
Step 3: Before recording, you must customize specific settings based on your preferences. To access the options, click the arrow next to the record button. Here, you can choose your microphone input, show mouse clicks, and adjust the quality of the recording.
Step 4: Click the red record button in the screen recording window to initiate the recording. You can capture the entire screen by clicking anywhere or selecting a specific portion to record video on Mac.
To conclude the recording, click on the stop button in the menu bar or press the “Command” + “Control” + “Escape” keys.
Step 5: After stopping the recording, QuickTime Player will open the video in a new window. To save the recorded video, navigate to the menu bar and click “File.”
Choose the “Save” option, select a destination folder, and provide a name for the video. You can use the “Export As” option to adjust the video format or quality settings if desired.
Method 2: Using the Photo Booth
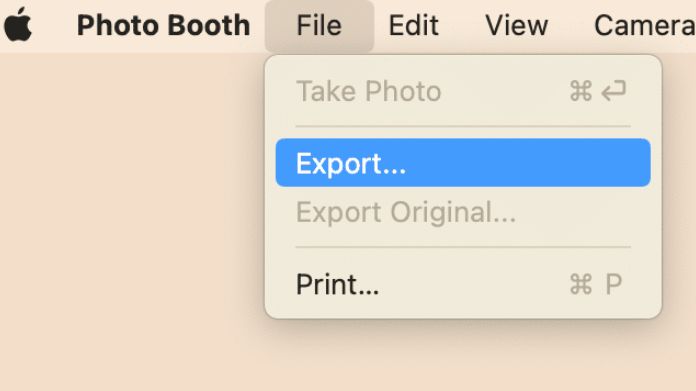
 Photo Booth is a user-friendly and convenient tool for capturing videos on your Mac. Enjoy recording your videos and exploring the creative possibilities with Photo Booth on your Mac.
To record a video using Photo Booth on your Mac, follow these simple steps:
Step 1: Launch the Photo Booth application on your Mac. You can find it in the Applications folder or use Spotlight search to locate it quickly.
Step 2: In the Photo Booth app, you’ll see various options at the bottom of the window. Click the “Video Recording” button, which looks like a filmstrip with a camera icon.
Step 3: Before starting the recording, you can adjust the camera settings if needed. Click on the “Effects” button, represented by a star icon, to explore different effects and filters you can apply to your video. Experiment with these settings to personalize your recording.
Step 4: Position yourself in front of the camera, frame your shot, and when ready, click on the red video recording button to begin recording. You’ll see a countdown, usually three seconds before the recording starts.
Step 5: To stop the recording, click on the stop button, the same red video recording button you clicked to start recording. Photo Booth will automatically save the video to your “Photo Booth” folder in the “Pictures” directory on your Mac.
Step 6: Preview and Share the Video Once the recording is saved, preview it by clicking on the thumbnail in the bottom-left corner of the Photo Booth window.
If you’re satisfied with the video, you can share it directly from Photo Booth using the built-in sharing options. You can email it, send it via AirDrop, or share it on various social media platforms.
Method 3: Using the Screenshot App
 If you use macOS Mojave and later, you can use hotkey to quickly trigger the Screenshot Toolbar for screen recording with audio. You don’t need to download any other apps; it is free.
Step 1: For macOS Mojave and later versions, Mac provides the Screenshot app, which includes video recording capabilities.
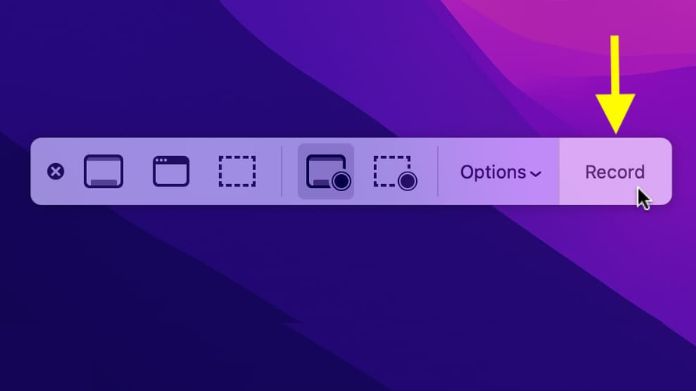
To access the Screenshot app, press “Shift” + “Command” + “5” on your keyboard. This action will activate the Screenshot toolbar at the bottom of the screen.
Step 2: In the Screenshot toolbar, you can customize various recording options. Click on the “Options” button to select the desired microphone input, choose whether to show mouse clicks in the recording, and set the save location for the video file.
Step 3: To begin recording, click on either the “Record Selected Portion” or “Record Entire Screen” button in the Screenshot toolbar.
If you choose to record a specific portion of the screen, drag and select the area you want to capture. To stop the recording, click on the stop button in the menu bar or press the “Command” + “Control” + “Escape” keys.
Step 4: Once you stop recording, a thumbnail of the video will appear in the bottom-right corner of the screen. Click on the thumbnail to open the video in the Screenshot app.
To save the video, click on the “Done” button and choose a destination folder. Within the Screenshot app, you can also trim the video or make additional edits, if desired.
Conclusion
So this is all about how to record on Mac. You can confidently record videos on your Mac by following the step-by-step guide.
Both methods discussed in this guide give you the ability to save and export your recordings to the desired location on your Mac.
Now, you’re ready to start recording on Mac like a pro!!


